Comments Off on Living Room for PC Gaming – Some Solutions
Usually I would use Google+ for something like this but since I’m doing in-line images and stuff I really needed something that offers more flexible layouts. So here I am on my seldomly used blog.
Anyway, a couple of weekends ago, I hooked up my backup gaming PC (Ivybridge Core i7 and Geforce 680) to my 65″ living room TV. I’d picked up a cheap wireless 802.11n dongle and played some League of Legends and stuff in 7.1 surround in comfy couch mode. I decided, I needed a more permanent setup.
At first, I was using a 15′ USB extension cord to get KB and mouse to my couch. The daughterly unit tripped over it and it wasn’t “pretty”. Not so good. I decided I wanted the PC closer to the back of the room, so I picked up a 30′ HDMI cable from monoprice.com (btw, if you ever need cables of any kind, that’s where you go). I ran the cable under the edge of the carpet around the room to hide it. Cost was about $45.
Second, I was getting significant packet loss for online play over the wireless connection (it’s a fair distance, through many layers of sheet rock from my office to my living room). Multiple disconnects, reconnects. As luck would have it Amazon was having a crazy sale on Trendnet TPL-402E2K 500Mbps homeplug network setups. Now, it’s no where near 500Mbps (in practice it seems closer to about 15-20Mbps) but it streams HD from my media server or Netflix with no problem and I had no disconnects in LOL last night. So I’ll call that a win. For good measure, I just ordered another set to get my upstairs bedroom and family room on the same homeplug network as the set is still on sale at Amazon (normally $199, currently $69).
I also picked up some time ago, a nice Microsoft wireless controller receiver so that my wireless X360 controllers can sync with my PC. I’ll be moving my Mad Catz RAT 9 mouse to the living room for wireless goodness and using my RAT 7 in the office (same mouse but wired). I made a call to my boys at Mad Catz to see if I couldn’t liberate one of their new Strike 7 keyboards seeing as I love their RAT 7 and RAT 9s so much. I’m told, there’s one in the mail to me as we speak.
So I set this all up last night and played some Xcom and Skyrim too just to mess around. I’m all smiles.
PHASE 2
For the next step in the project, I needed a better surface for the keyboard and mouse when I’m sitting on the couch. I was inspired by the Couchmaster from Nerdytec (http://www.nerdytec.com/). Their price is 150 Euro ($200) for the lower end unit.

I challenged myself to see if I couldn’t make something that was functionally equivalent (I don’t need pockets, wrist rests, cable routing or USB hubs) for about $50 or less. I succeeded.
First, I needed a surface. I selected an 8 foot 1″ X 12″ at Home Depot that I had cut to 32″ in length. In hindsight, I probably should have done 34″ or 35″ but it’s fine. Cost: $10.
Second, I went to Wal-mart and bought 1 yard of black denim fabric. I really wanted some faux black leather, but they didn’t have any, so this was close enough to match my black leather couches and is fairly durable. Cost: $5.
I then picked up some industrial strength black Velcro from Home Depot. Cost: $3.
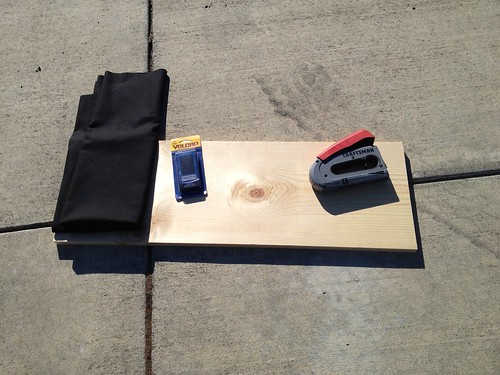
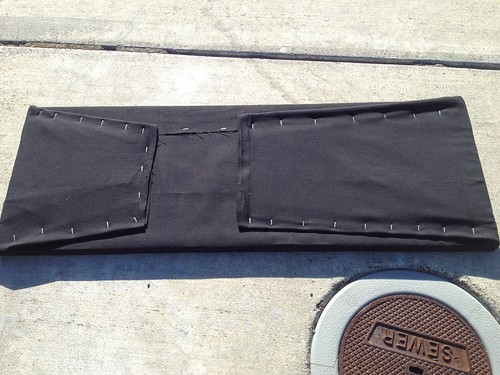
Step 1: Wrap the 32″ x 1″ x 12″ in the black denim and staple gun it all together. When you’re done it should look like this:
The top side (where your KB and mouse will go) should look like this:
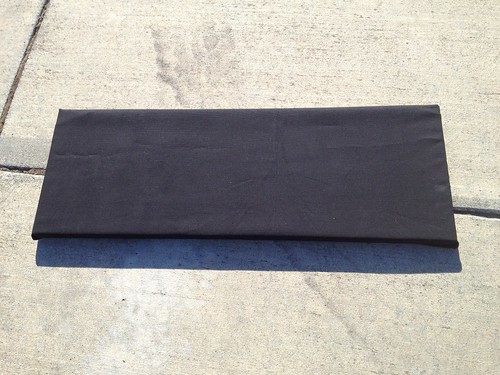
All good. Now I have a decent mousing surface that I wanted to semi-permanently affix. It’s a hard surface but this could just as easily be done with a soft mouse pad.
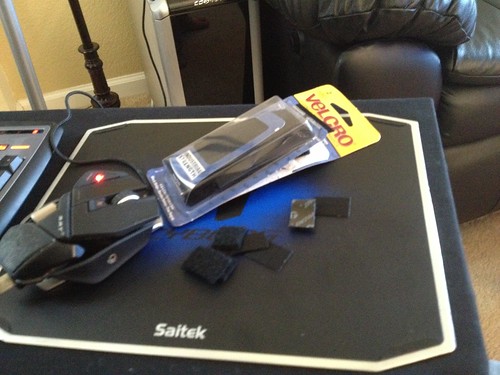
I put bits of velcro at each corner of the mousing surface. then stuck the other side to the denim. I then pulled the velcro apart and staple gunned the velcro into the denim in for good measure.
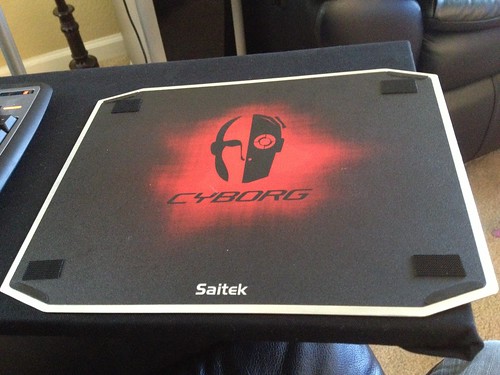
Here it is affixed to the board via velcro.
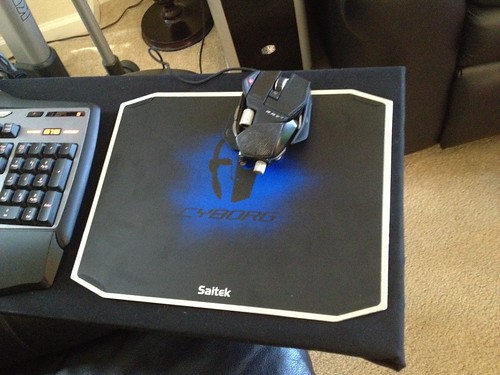
Now, I could do the same process with the keyboard, however, I’m going to swap keyboards so, so for now, the keyboard is just sitting on top. When I get the new keyboard, I will make it semi-permanent with the same velcro approach.
The next part I need are the supports for the board. I was thinking, what’s in the Nerdytec supports? Clearly, it’s some sort of foam. So I Googled “foam” and came across a site that will custom cut and ship foam called Foam Factory. There you can input shapes and sizes of custom foam and have them sent your way.
I selected custom cushion, that was to be 6″ thick x 8″ wide by 24″ long (using dimensions similar to those given on the Nerdytec site). I used regular poly foam and I had a dacron wrap added to them, just for looks. The cost for two of them was $25 with shipping.
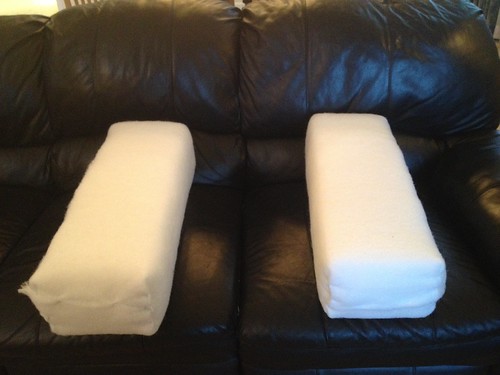
For the record, the dacron wrap adds some height and width. I may at some point remove it. Even when using the 6″ high, it’s a little higher than I’d like. In hindsight, a 5″ thickness might have been the better way to go for my legs/setup. But either way, it works great.
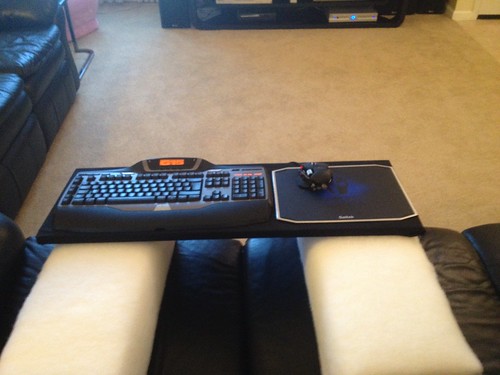
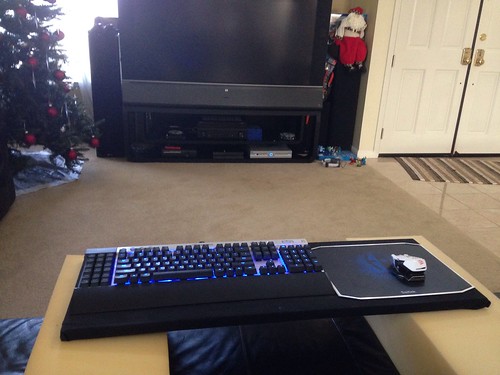
Here’s a more current pic with mechanical keyboard (much better).
Try it, you’ll like it. 🙂
